Tenant onboarding is the process of preparing a new tenant to move into a property while ensuring all legal, financial, and operational steps are completed. It covers everything from lease signing and payment collection to property inspection and utility setup. The goal is to create a smooth transition for tenants while protecting the property owner’s interests.
A tenant onboarding checklist is a structured tool that helps property managers complete these tasks consistently. It acts as a reference to confirm that every step, no matter how small, is handled on time and in compliance with regulations.
For property managers in Southern California, where local laws and property conditions can vary widely, an organized onboarding process reduces errors, prevents disputes, and supports tenant satisfaction. Industry data shows that tenants who rate their move-in experience highly are far more likely to renew their lease, reducing turnover costs and vacancy periods.
By adopting a clear onboarding process supported by a checklist, property managers can streamline operations, maintain compliance, and set the foundation for a professional landlord-tenant relationship from the first day of tenancy.
What is a Tenant Onboarding Checklist?
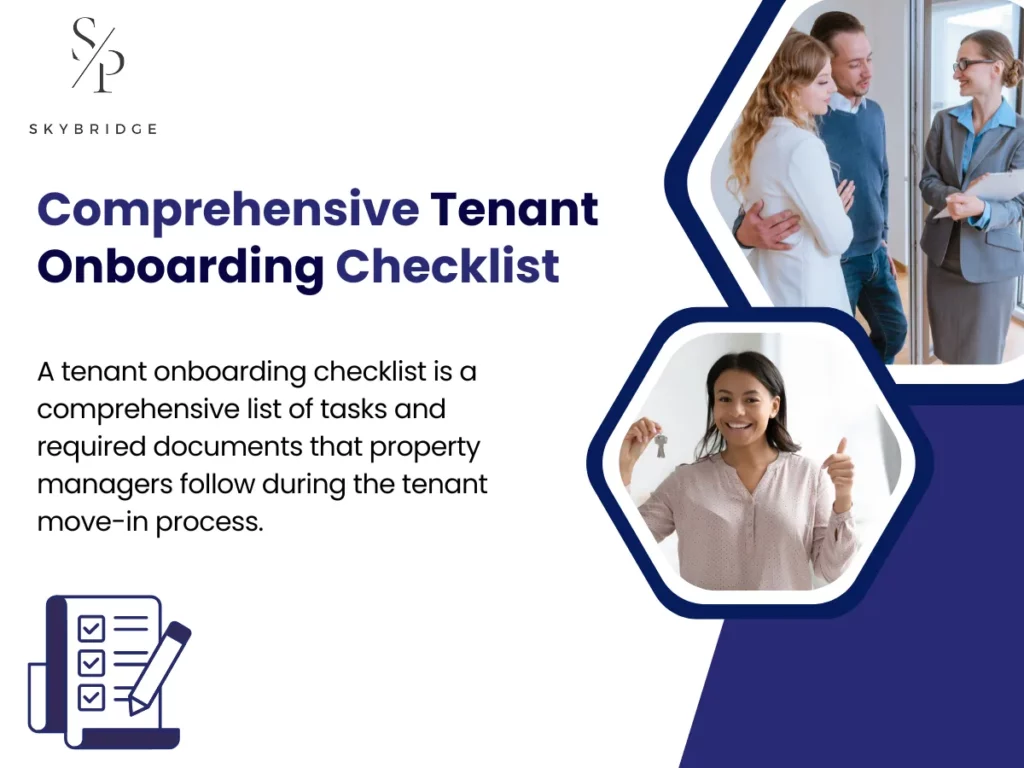
A tenant onboarding checklist is a comprehensive list of tasks and required documents that property managers follow during the tenant move-in process. It provides a step-by-step guide to ensure every action, such as verifying payments, conducting property inspections, setting up utilities, and delivering keys, is completed in the right order and within legal requirements.
Its purpose is to create consistency, reduce oversights, and make the transition seamless for both the tenant and the property manager. According to the National Apartment Association, well-structured onboarding processes can reduce tenant disputes by up to 35%, as responsibilities and expectations are communicated from the start.
The checklist also functions as both a compliance safeguard and a relationship-building tool. By standardizing each step, property managers can meet legal obligations, provide documented proof of completed tasks, and deliver a smooth move-in experience that improves retention rates and lowers turnover costs.
Why is the Tenant Onboarding Checklist Important?
A tenant onboarding checklist is more than an organizational aid; it is a safeguard for legal compliance, tenant satisfaction, and operational efficiency. It helps property managers complete every requirement accurately, minimizes misunderstandings, and creates a positive first impression that can set the tone for the entire lease term.
The key importance of a tenant onboarding checklist includes:
- Legal Compliance – Verifies adherence to state and local regulations, such as California’s security deposit and disclosure laws.
- Clear Documentation – Records all actions, agreements, and property conditions to prevent future disagreements.
- Operational Consistency – Creates a repeatable, error-free process across all properties.
- Time Efficiency – Streamlines tasks so managers can focus on higher-value activities.
- Tenant Satisfaction – Builds trust and confidence through a well-organized move-in process.
- Reduced Turnover – Encourages renewals by making a strong first impression; tenants who rate onboarding highly are 49% more likely to stay.
- Dispute Prevention – Minimizes conflicts by clarifying responsibilities upfront.
- Brand Reputation – Demonstrates professionalism, helping attract quality tenants.
- Financial Stability – Reduces vacancy periods and marketing costs by improving tenant retention.
What is the Step-by-Step Process for Onboarding New Tenants?
A smooth tenant onboarding process requires a clear sequence of actions, from application review and screening to lease signing, property inspection, and utility setup. Each step ensures compliance, minimizes disputes, and fosters a positive move-in experience. Following these steps consistently helps property managers maintain operational efficiency, protect the property, and build trust with tenants right from day one.
Step 1: Application Review
Before moving forward with any tenancy, property managers need to gather and verify the applicant’s information in detail. Application review serves as the first filter, ensuring only qualified candidates advance to the next stage. This step prevents wasted time on incomplete or unsuitable applications and helps create a reliable foundation for the screening process. To conduct a thorough application review, property managers should:
- Collect and verify all application forms for accuracy and completeness, including signatures and dates.
- Confirm legal identification, such as a driver’s license or government-issued ID.
- Review rental history for prior tenancy duration, payment patterns, and any evictions.
- Validate employment details with official pay stubs, offer letters, or employer verification.
- Assess income sufficiency by comparing monthly earnings to rent requirements (commonly 2.5–3 times the rent).
- Check for inconsistencies or missing information that could indicate red flags.
Step 2: Tenant Screening
Once applications have been reviewed, the next priority is confirming the tenant’s reliability through a structured screening process. This stage goes deeper into financial, criminal, and rental history checks, helping property managers identify potential risks before signing a lease. It’s a safeguard that protects both the property’s condition and the owner’s financial stability. When screening tenants, property managers should:
- Run a credit report to evaluate payment history, outstanding debts, and credit score.
- Check criminal background records for relevant offenses that may impact tenancy safety.
- Verify landlord references to confirm past rental conduct, including on-time payments and property care.
- Confirm employment status with direct employer contact or HR confirmation.
- Cross-check application details against third-party reports for consistency.
Step 3: Lease Agreement Preparation and Signing
After identifying a suitable tenant, the focus shifts to putting terms in writing through a clear and enforceable lease agreement. This document defines rent amounts, lease duration, and both parties’ responsibilities, reducing the likelihood of disputes later. A well-prepared lease ensures compliance, clarity, and mutual understanding from the start. To prepare and finalize a lease agreement:
- Specify rent amount, due date, and accepted payment methods in clear language.
- State lease duration and any renewal or early termination provisions.
- Detail security deposit terms, including allowable deductions and return timelines.
- List maintenance responsibilities for both the tenant and landlord, covering repairs and upkeep.
- Include rules on property use, such as noise limits, subletting, and alterations.
- Ensure both parties sign and date the agreement and provide copies for records.
Step 4: Payment Collection (Deposit, First Month’s Rent)
Securing the property for a new tenant requires prompt and accurate payment collection. This step confirms the tenant’s financial commitment and provides the funds needed for operational costs. It also sets the standard for how payments will be handled throughout the lease term, making accuracy and documentation critical. When collecting move-in payments, property managers should:
- Confirm the exact amounts for the security deposit and first month’s rent based on the lease agreement.
- Establish due dates that align with lease terms and communicate them clearly to the tenant.
- Offer secure payment methods such as bank transfers, certified checks, or online platforms.
- Issue detailed receipts that include payment date, method, and purpose.
- Record transactions in both accounting software and tenant files for compliance and reference.
Step 5: Property Inspection
Documenting the property’s condition before a tenant moves in is essential for avoiding disputes over damage later. A thorough inspection protects both landlord and tenant by creating a shared record of the property’s state. This process should be detailed, methodical, and supported with visual evidence. For an effective move-in inspection, property managers should:
- Check all appliances to ensure they are functional and safe.
- Inspect plumbing fixtures for leaks, water pressure, and drainage.
- Examine walls, ceilings, and floors for cracks, stains, or damage.
- Test electrical outlets, lighting, and safety devices like smoke detectors.
- Photograph each room and label images with the date and area.
- Record findings in a written inspection report signed by both parties.
Step 6: Move-in Checklist Creation
A move-in checklist serves as the official record of the property’s condition and outlines tenant responsibilities. It ensures both parties agree on the state of the unit at handover, reducing the likelihood of disputes during move-out. To create a comprehensive move-in checklist, property managers should:
- Detail the condition of each room, including fixtures, flooring, and paint.
- List any pre-existing damage with notes and supporting photos.
- Include cleaning expectations for kitchens, bathrooms, and common areas.
- Specify tenant responsibilities for upkeep, such as lawn care or trash disposal.
- Have both parties sign and date the checklist for verification.
Step 7: Key Handover
The key handover is the final physical step before a tenant assumes occupancy. It symbolizes the transfer of responsibility and provides access to the property and its amenities. Proper documentation and security measures at this stage help avoid future complications. For a secure key handover, property managers should:
- Provide all necessary keys for doors, mailboxes, storage, and amenities.
- Share access codes for gates, security systems, or smart locks.
- Explain lock and alarm procedures to the tenant.
- Have the tenant sign a key receipt detailing the number and type of keys issued.
- Keep a copy of the signed receipt in the tenant’s file.
Step 8: Utility Transfers
Ensuring utilities are ready on move-in day prevents tenant inconvenience and supports a positive first impression. Proper coordination with utility providers guarantees that services are active and billed in the tenant’s name. To handle utility transfers efficiently, property managers should:
- Identify all necessary services, including electricity, water, gas, and internet.
- Contact providers to arrange service start dates before the move-in date.
- Verify any deposits or setup fees required from the tenant.
- Provide instructions for setting up accounts in the tenant’s name.
- Confirm activation before the tenant’s arrival.
Step 9: Post-Move-in Check
Following up after move-in ensures the tenant is settling in well and that all agreed-upon services and property conditions meet expectations. This step also allows managers to address issues before they escalate and reinforces a professional landlord-tenant relationship. For a productive post-move-in check, property managers should:
- Confirm all utilities are working as intended.
- Address any initial maintenance requests promptly.
- Review community guidelines and amenity use policies.
- Ask for feedback on the move-in experience to identify improvements.
- Document the visit and any agreed actions for future reference.
What are the Key Components of a Tenant Onboarding Checklist?
A well-structured tenant onboarding checklist ensures that no critical steps are overlooked during the move-in process. It helps property managers maintain compliance, prevent disputes, and provide a consistent tenant experience. By including clear terms, conducting documented inspections, establishing payment structures, and providing tenant resources, managers can build trust from day one and increase the likelihood of lease renewals.
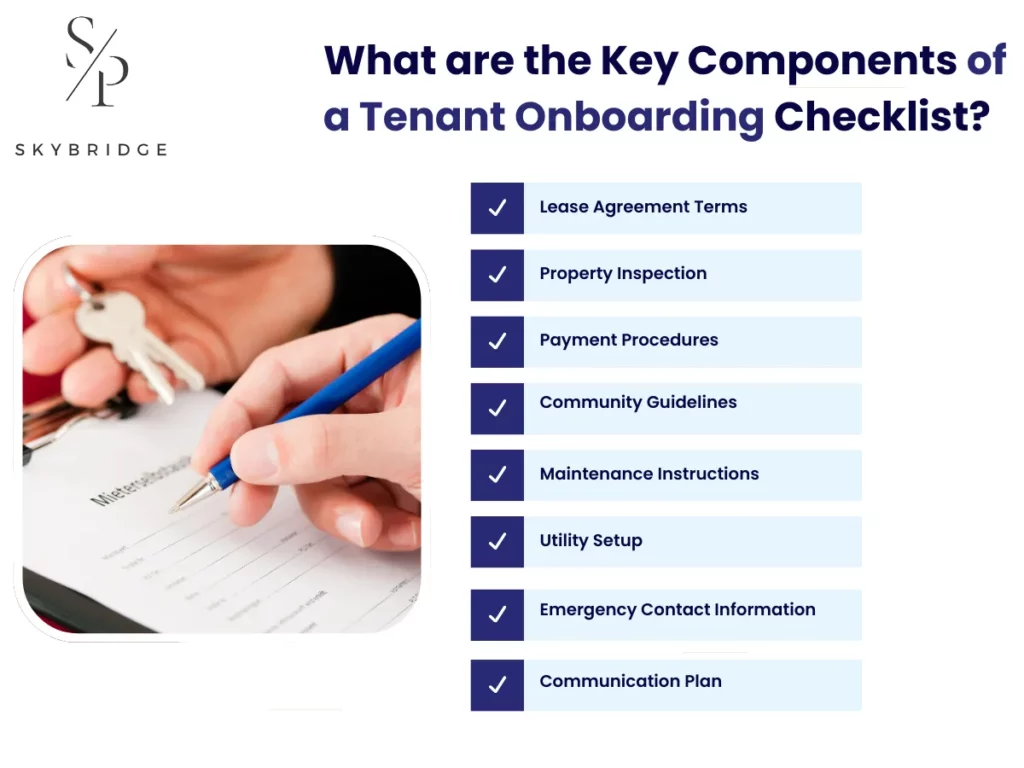
Lease Agreement Terms
At the core of every tenancy is the lease agreement, the document that legally defines the terms of the rental relationship. It sets the financial framework, clarifies property use rules, and protects the rights of both landlord and tenant. Without clearly written terms, misunderstandings and disputes become far more likely. To ensure thorough lease terms, property managers should:
- State the rent amount and clearly outline the payment schedule.
- Specify the lease duration and renewal or termination options.
- Include rent increase clauses with notice periods.
- Define late payment penalties and grace periods.
- Detail security deposit conditions for collection, holding, and return.
- Describe maintenance obligations for both the tenant and the landlord.
Property Inspection
Before a tenant takes possession, a detailed inspection is the best safeguard against later disputes. This step documents the property’s exact condition, confirming it meets safety and habitability standards. A properly conducted inspection also creates a shared record that protects both parties from false damage claims. For a complete property inspection, managers should:
- Inspect appliances for safety and function.
- Check plumbing for leaks, drainage, and water pressure.
- Examine walls, ceilings, and floors for damage or wear.
- Test electrical systems and safety devices.
- Photograph each room with date stamps.
- Record all findings in a signed inspection report.
Payment Procedures
Setting out how rent will be paid is just as important as the amount itself. Payment procedures define due dates, acceptable payment methods, and consequences for late submission, reducing the risk of missed or disputed payments. When outlined clearly, they help maintain predictable cash flow and smooth landlord-tenant relations. To establish clear payment processes, property managers should:
- List the rent amount and due date in the lease.
- Specify accepted payment methods such as bank transfer, check, or online portal.
- Outline late payment penalties and timelines.
- Provide receipts for all payments received.
- Keep accurate transaction records for legal and accounting purposes.
Community Guidelines
Following the rules for living within a shared property or community keeps day-to-day life harmonious. Community guidelines set behavior standards for tenants, outline rules for amenities, and explain how violations will be addressed. By establishing these early, managers reduce conflicts and foster a respectful, cooperative environment. Some major effective guidelines are:
- Set noise level policies and quiet hours.
- Establish parking regulations and permit requirements.
- Define pet policies, including size, breed, and number limits.
- Outline rules for common area use and shared facilities.
- Specify consequences for violations and enforcement procedures.
Maintenance Instructions
Clarity around property upkeep prevents confusion about who handles what. Maintenance instructions explain both the tenant’s and landlord’s responsibilities, ensuring the property remains safe and functional throughout the lease term. They also provide steps for reporting issues quickly to minimize damage. Key maintenance instructions are:
- Assign tenant responsibilities such as lawn care or basic cleaning.
- Clarify landlord obligations for major repairs and replacements.
- Provide a process for submitting maintenance requests, including contact methods.
- Explain emergency repair procedures and response times.
- Require documentation for all repair requests.
Utility Setup
Ensuring that utilities are active on move-in day is a critical part of the onboarding process. Without proper coordination, tenants could face service delays and billing confusion. Utility setup ensures a smooth start to occupancy and prevents disputes over account responsibility. Managers should:
- Identify required utilities, including electricity, water, gas, and internet.
- Provide the provider contact details for tenant setup.
- Arrange service activation dates before move-in.
- Communicate deposit and documentation requirements for each service.
- Verify activation before key handover.
Emergency Contact Information
When urgent issues arise, tenants need immediate access to the right contacts. Providing a clear list of emergency numbers and after-hours contacts ensures fast action when it matters most. This information also reinforces a sense of security and support. To prepare, property managers should:
- Provide direct contact information for the property manager.
- List emergency service providers like plumbers and electricians.
- Include after-hours contact options for urgent repairs.
- Outline the procedure for reporting emergencies.
Communication Plan
Consistent and clear communication prevents misunderstandings over the course of a tenancy. A defined communication plan specifies how tenants should reach the landlord or property manager for different types of issues, from routine maintenance to emergencies. Setting these rules early improves efficiency and responsiveness. Managers should:
- Confirm tenant contact information for updates and notices.
- Explain the maintenance request protocol and response times.
- Provide emergency communication procedures for urgent issues.
- Clarify the channel for lease-related questions or changes.
What Are the Best Practices of Using a Tenant Onboarding Checklist?
Applying best practices to a tenant onboarding checklist ensures each tenancy begins with clarity, efficiency, and professionalism. These practices help property managers minimize delays, maintain compliance, and improve tenant satisfaction. Incorporating modern tools, clear communication, and personalized experiences streamlines the process and supports stronger landlord-tenant relationships.
Clear and Transparent Communication
Strong communication during onboarding helps build trust and sets the foundation for a smooth tenancy. Tenants should have a clear understanding of lease terms, property rules, and maintenance responsibilities before moving in. This transparency prevents misunderstandings and helps tenants feel confident in their new living arrangement.
Property managers should provide move-in instructions early, explain rules in plain language, and be available to answer questions promptly. Maintaining consistent communication through the move-in period creates a positive tenant experience and reduces the likelihood of disputes later.
Using Technology and Automation
Digital tools can streamline the onboarding process, making it faster and more accurate. Online lease signing, automated rent reminders, and property management software reduce manual work and improve record-keeping. These tools also provide tenants with more convenient ways to complete required steps.
By automating repetitive tasks and centralizing information, property managers can focus on tenant support and problem-solving. This efficiency benefits both parties, ensuring the onboarding process is completed on time and with fewer errors.
Personalizing the Onboarding Experience
Personal touches during onboarding make tenants feel welcome and valued. A welcome packet, a friendly introduction to community amenities, or custom move-in instructions can create a lasting positive impression. These efforts demonstrate that the property manager values the tenant’s comfort and satisfaction.
When tenants feel acknowledged and supported from the start, they are more likely to stay longer and care for the property. Personalization turns a standard process into a memorable experience, strengthening tenant loyalty.
Streamlining the Lease Agreement Process
An organized and efficient lease process saves time for both landlord and tenant. Preparing documents in advance, using e-signatures, and sending timely reminders prevent delays and reduce paperwork stress.
Clear lease terms presented in an accessible format help tenants fully understand their rights and responsibilities. A smooth signing experience reinforces professionalism and sets a positive tone for the tenancy.
Automating Routine Tasks
Automating repetitive administrative tasks can greatly improve efficiency in tenant onboarding. Rent reminders, lease renewal alerts, and maintenance scheduling can all be handled by property management software.
This automation ensures important actions are not overlooked and keeps tenants informed without additional manual effort. It also frees up time for property managers to focus on relationship building and strategic tasks.
Regular Check-ins and Feedback
Following up with tenants after move-in shows a commitment to their comfort and satisfaction. A simple check-in can identify issues early and provide an opportunity to address concerns before they escalate.
Gathering feedback through surveys or informal conversations helps improve the onboarding process for future tenants. Consistent follow-ups also strengthen landlord-tenant relationships and contribute to higher retention rates.
Secure Qualified Tenants with Our Comprehensive Tenant Onboarding Checklist
A detailed tenant onboarding checklist streamlines the qualification process by ensuring every applicant meets strict financial, background, and suitability standards. By following this structured approach, property managers can avoid costly mistakes, minimize disputes, and secure tenants who are more likely to pay on time, care for the property, and renew their leases.
Working with a local California property management company means having professionals handle every stage of the onboarding process, from marketing the property and screening applicants to preparing lease agreements, coordinating inspections, and managing move-in logistics. Their expertise in local rental laws, market conditions, and tenant expectations ensures the checklist is applied effectively, resulting in tenants who are both reliable and a good fit for the property.